


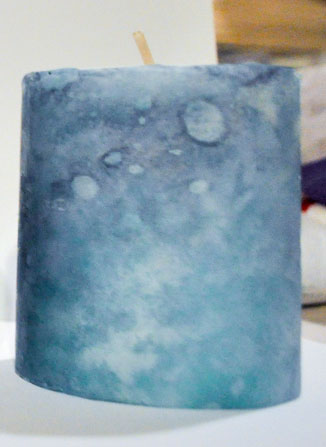
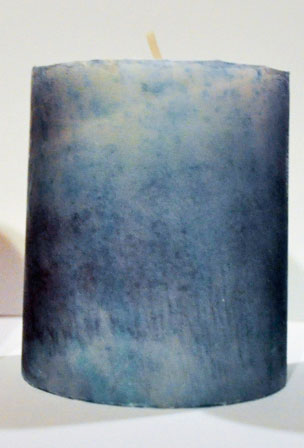
Citra Art Candles
All images are copyright by the artsit. Please do not use without permission.

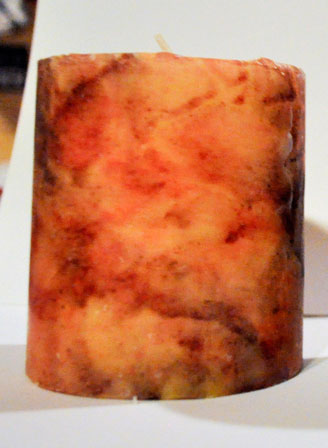
You can use your Citra Art to make custom candles! This is very easy to do, but may take a couple/few attempts to get the result you want. Beautiful way to have inexpensive custom décor in your home, or for a special event!
As always, never leave candles unattended!! If you see the candle is not burning cleanly down the center, you'll want to extinguish the candle. I've not had any problems with the heat affecting the tissue, but my candles have been center-burning. Caution, Caution, Caution!
Supplies Needed:
- Printable Citra Art
- White Tissue Paper – large enough to cover the card stock, with some excess
- 8 ½ x 11 card stock (or larger if you have a wide format printer and large candle)
- Repositionable Spray Adhesive
- Scissors
- White Pillar Candle
- Parchment Paper (the kind used in the kitchen) - you'll need a sheet large enough to fit around the diameter of the candle, with about 12-15" extra
- Craft Heat Gun (the kind you would use with embossing powders in rubber stamping)
- Choose your Citra Art and size it to be a little larger than the height and diameter of your candle.
- Lightly spray the card stock with the repositionable spray adhesive.
- Lay your white tissue paper on top of the card stock and smooth out as best as you can. If you're using an inkjet printer, minor wrinkles in the tissue won't matter.
- Trim the tissue paper around 3 sides of the card stock, right to the edges. Leave about one inch extra of the tissue paper at one of the 8 ½" ends.
- Place the tissue paper/card stock in your printer, with the tissue "overflow" edge going through the printer last, and print the design.
- Once printed, lay the tissue paper/card stock on a flat surface. Grab the tissue "overflow" edge, and gently peel the tissue away from the card stock. Once you have some visible card stock, it helps to hold that down while separating.
- Trim the tissue paper directly to the edges of the design.
- Wrap the tissue around the candle, smoothing as you go. You should have some extra where the two ends meet. Don't worry if the top and bottom are not perfectly straight. As long as the design completely covers the candle, top to bottom and diameter, it's all good! That's why you sized the print to be a little larger! And, with the Citra Art, it really doesn't matter!
- Where the two ends meet, trim off some of the extra until there is just a slight overlapping of the edges.
- Lay the wrapped candle, seam side down, in the center of the parchment paper. Note – you will only be able to heat part of the candle at a time!
- Wrap the parchment tightly around the candle, making sure the tissue wrap doesn't loosen.
- With the excess parchment, fold it down a couple of times so you have something to grab onto.
- Holding the parchment firmly so that it's tight around the candle in one hand, and with the heat gun in your other hand, turn on the heat gun.
- Holding the heat gun 6-8 inches away from the candle, blow the heat directly on the wrapped candle, moving the heat gun constantly so it isn't hitting one spot for too long. AND! Be sure to not get the heat too close to your hands! You will feel some heat!
- After a minute or so, you will be able to see the wax of the candle begin to melt! This is embedding the tissue design into the candle!
- Once you've gone as far around the candle as you can without burning yourself, turn off the heat gun and lay the candle in the parchment down for a moment. When it's cooled for about 30 seconds, unwrap the parchment, and slowly roll/lift the candle off.
- Let the parchment cool for another minute or so. If there is any wax on the parchment, you want to brush it off before re-wrapping the candle.
- Place the unmelted portion of the candle in the center of the parchment, and repeat the process from step 11, until you've been able to heat all the way around the candle.
- Once cooled, you can trim the top and bottom edges of the waxed tissue for clean edges.